Post by ADMIN on Aug 23, 2012 14:08:21 GMT 10
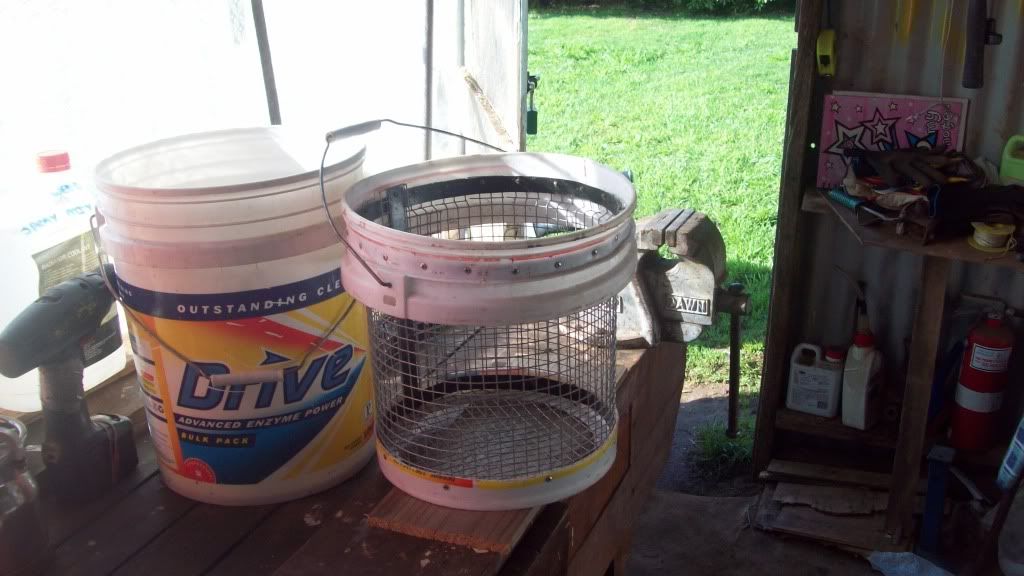
tried these plans out to make this classifier , it seems to work ok to sort material down to decent size to pan or put through sluice , next project is highbanker , have got plans just need to make sheetmetal bender to make it cheers Mick


How to Build a Field Classifier
by Chuck Cummins, Mechanical Design Engineer
Materials and Equipment
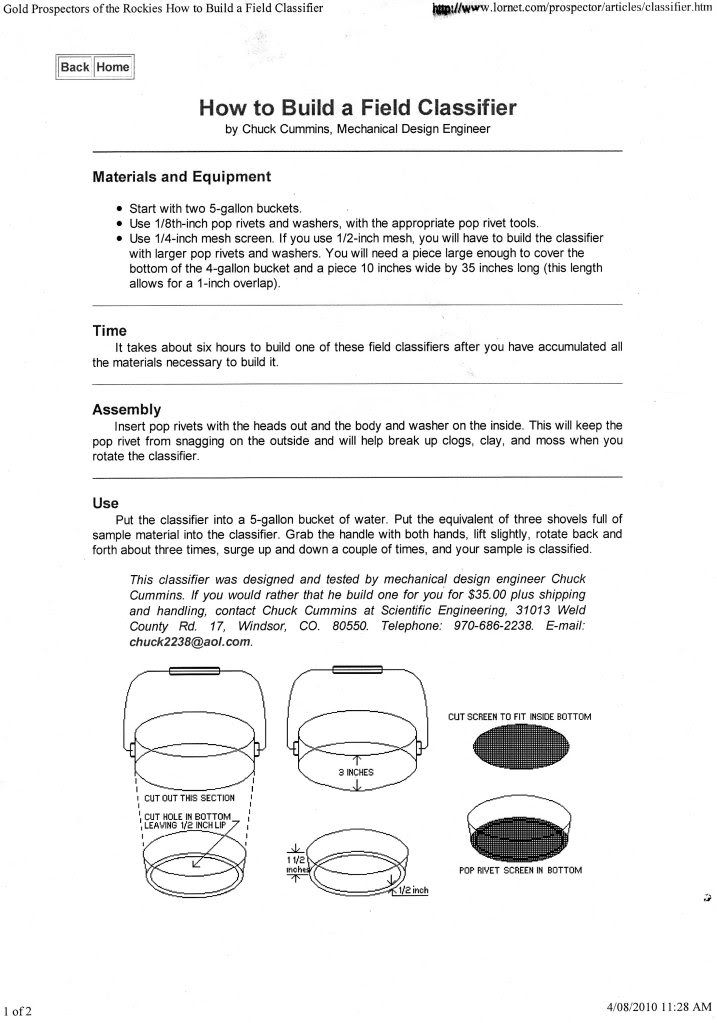
Start with two 5-gallon buckets.
Use 1/8th-inch pop rivets and washers, with the appropriate pop rivet tools.
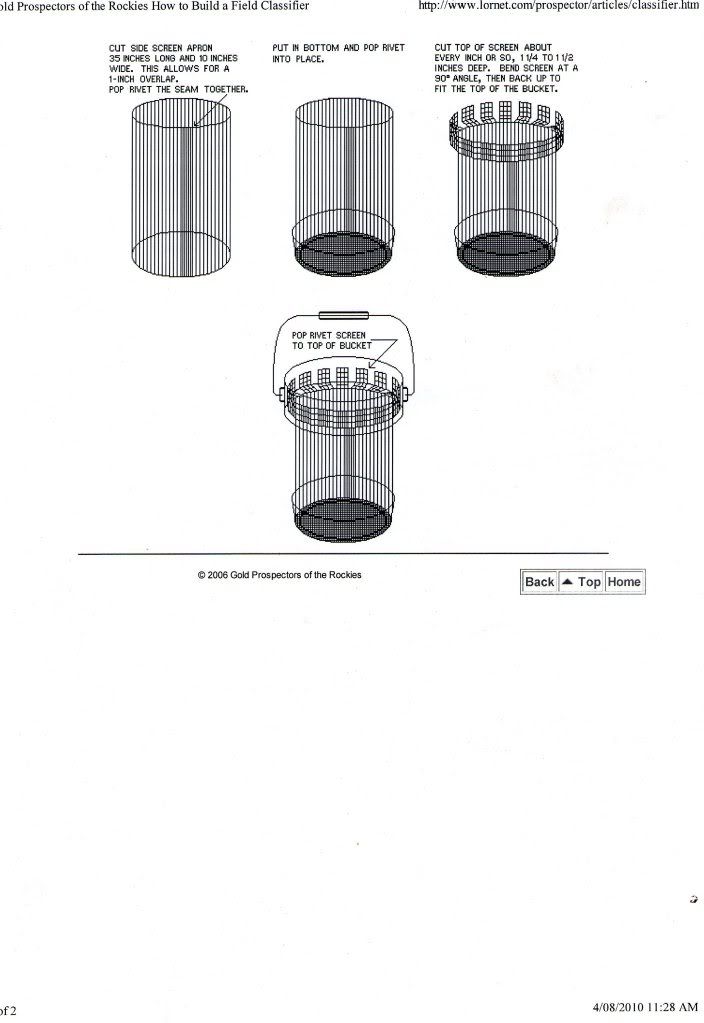
Use 1/4-inch mesh screen. If you use 1/2-inch mesh, you will have to build the classifier with larger pop rivets and washers. You will need a piece large enough to cover the bottom of the 4-gallon bucket and a piece 10 inches wide by 35 inches long (this length allows for a 1-inch overlap).
Time
It takes about six hours to build one of these field classifiers after you have accumulated all the materials necessary to build it.
Assembly
Insert pop rivets with the heads out and the body and washer on the inside. This will keep the pop rivet from snagging on the outside and will help break up clogs, clay, and moss when you rotate the classifier.
Use
Put the classifier into a 5-gallon bucket of water. Put the equivalent of three shovels full of sample material into the classifier. Grab the handle with both hands, lift slightly, rotate back and forth about three times, surge up and down a couple of times, and your sample is classified.
This classifier was designed and tested by mechanical design engineer Chuck Cummins. If you would rather that he build one for you for $35.00 plus shipping and handling, contact Chuck Cummins at Scientific Engineering, 31013 Weld County Rd. 17, Windsor, CO. 80550. Telephone: 970-686-2238. E-mail: chuck2238@aol.com.
Back Top Home
© 2006 Gold Prospectors of the Rockies
well it does work,but we changed the way its joined and used some banding to make it stronger rather than riverts and washers we tried it out not to bad for about $10 and 4-5 hours in the shed cheers Mick


 ?
?